This guide applies to Kyocera MFPs connected to either USB or to a local area network (LAN) for TWAIN scanning.
The TWAIN standard is used to pull images from a scanner directly into a software application that supports this method.
Kyocera multifunction printers (MFP) can support the TWAIN method of scanning. A TWAIN driver for your device needs to be installed on your PC which runs between the scanner hardware and a scanning application.
Note: Kyocera provides the TWAIN driver which allows the hardware to communicate but the driver installation does not contain scanning software.
Download and install the TWAIN driver
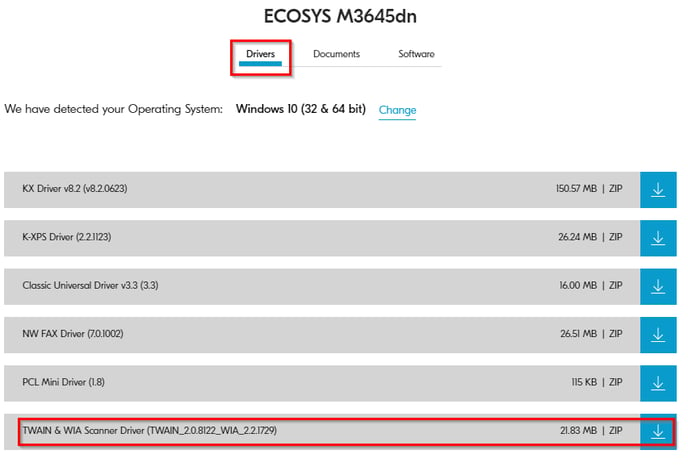
Visit the Kyocera website Support Centre download section.
Enter your Kyocera multifunction printer model name and choose the correct model as it appears in the drop-down list.

Under Drivers select TWAIN & WIA Scanner Driver and the website will automatically detect your computer’s operating system version.
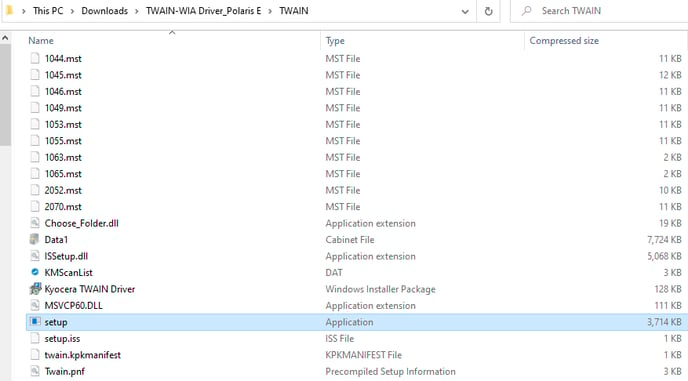
Once the file is downloaded on your computer, locate the file in your downloads folder (or wherever you saved the file). Extract the contents of the zipped file, go into the TWAIN folder and run Setup.exe.
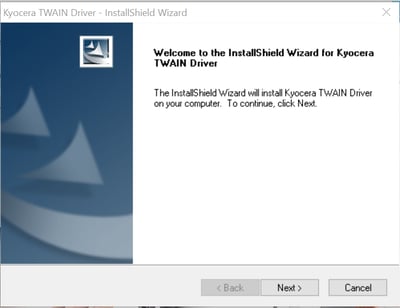
Follow the prompts to complete the installation of the TWAIN driver.
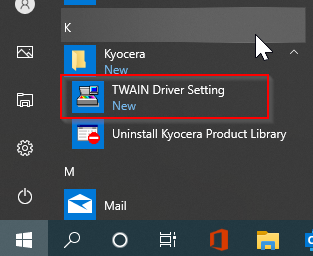
Click the Windows Start icon and look for TWAIN driver setting under the Kyocera folder.
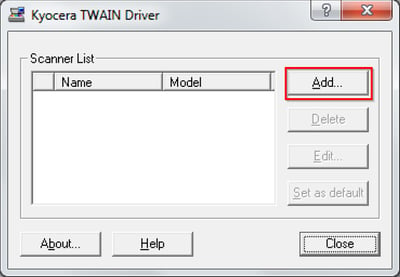
Your device will need to be set up as a TWAIN source, so to do this, click Add.
Configuring the TWAIN driver
Configuring the TWAIN driver settings is dependent on how the MFP device is connected, either via USB or network.
Choose the section appropriate for your setup:
- Network = 6.1 or USB = 6.2
6.1 The MFP is connected to the network:
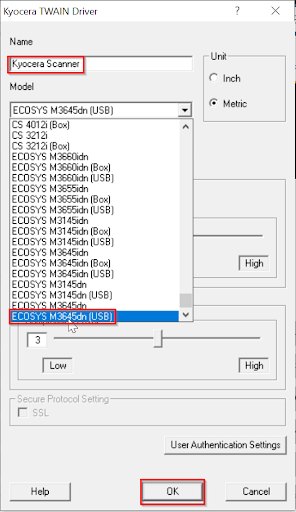
6.1.1 Give the TWAIN scanner a Name and select your model from the drop-down list. Be sure to select the option that does not contain USB next to the model.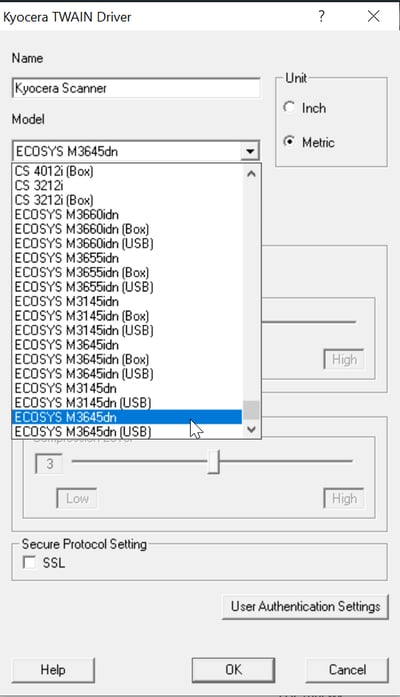
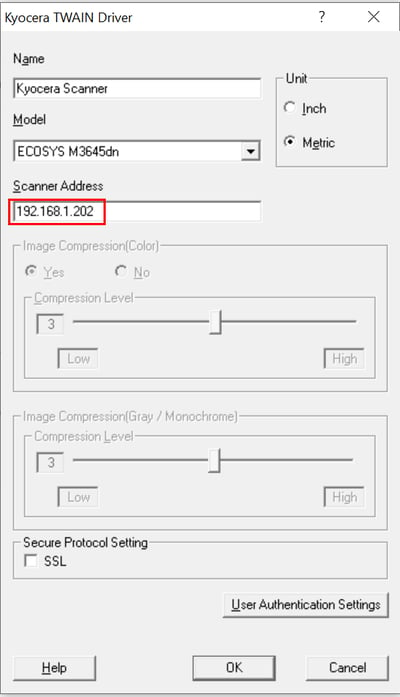
6.1.2 If you know the IP address of the printer, enter it under where it says Scanner Address then click OK.
Note: If you do not know the IP address, it can be found by printing a status page directly from the machine. To do this, press System Menu > Report > Report Print > Status Page. 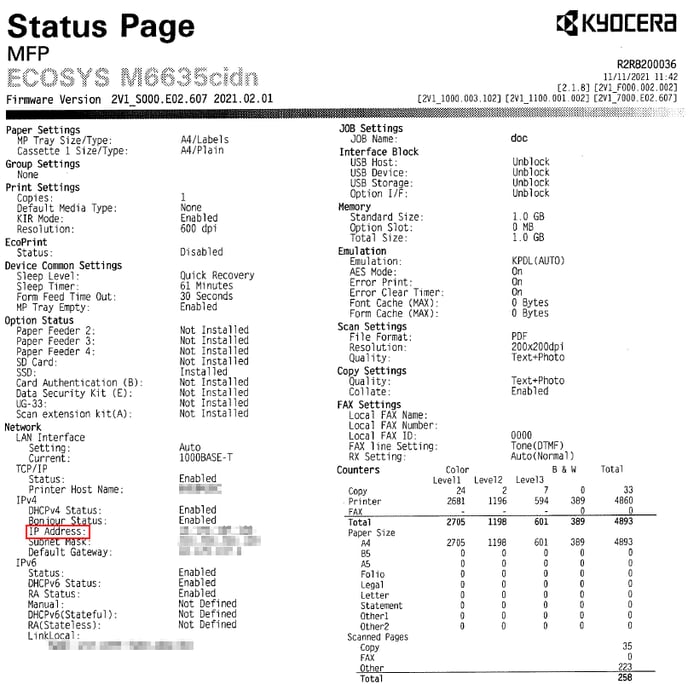
Take note of the number next to IP Address on the status page and enter it in the Scanner Address field (including all the full stops) then click OK.
6.1.3 Your printer should now come up in the list of scanners. Click Close to finish.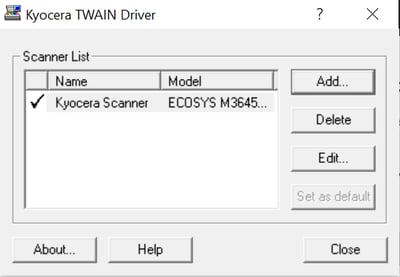
6.2 The MFP is connected via USB:
6.2.1 Give the TWAIN scanner a Name and select your model from the list. Be sure to select the USB option of the model, then click OK.
6.2.2 Your printer now comes up in the list of scanners, click Close to finish.
The Kyocera MFP is now set up as a TWAIN scanner.
To perform a scan, choose the appropriate menu options within your scanning application. Different scanning applications may have different menu options or methods for performing a scan so please refer to the documentation of your scanning software for more information on its usage.
Further assistance
If you require further assistance, please feel free to contact us directly via:
- Chat: the chat in the bottom right corner of our website. ↘️
- Phone: to speak to a member of the Kyocera support team, call our helpline on:
- Australia: 135 962 and choose option 3
- New Zealand: 0800 459 623
Phone Support hours are Monday to Friday 9am to 5pm local time across Australia and New Zealand (excl public holidays).
Chat Support hours are 9am to 5pm AEST/AEDT.