This guide will take you the process of scanning to email on your Kyocera device.
To enable scanning to email for the first time, you first need to find your IP address which is needed to access the Command Centre of the printer.
Identify your IP address
There are two ways to identify your IP address:
- by printing a status page or
- on the machine. Printers connected via Wireless/Wi-Fi will have to use the On The Machine method to obtain the IP address.
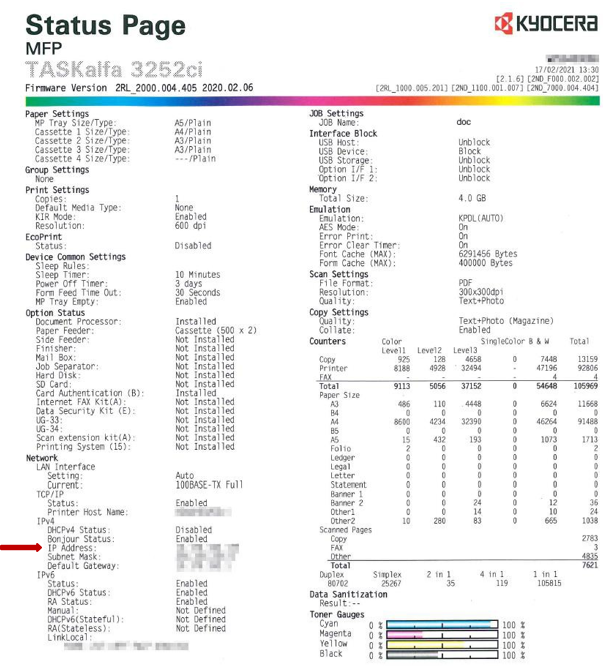
Printing a status page
Printing a status page is one of the fastest ways to find the IP address of the printer. The IP address can be found under the Network section.
On the machine method
For machines with a touch screen panel, the IP address can be found under System Menu > Report > Print Report > Status Page.
For machines without a touch screen panel, the IP Address can be found under Menu > Report > Report Print > Status Page.
For devices in the ECOSYS series the username and password are the last 2 numbers of your model followed by the numbers 00. For example, an ECOSYS M5521cdn would be 2100 for the username and password.
After successful login, select Network Setting > Wired Network Setting or Wi-Fi Setting > TCP/IP Setting > IPv4 > IP Address. Record these numbers so you can refer to them later.
Configure your device via the Command Centre
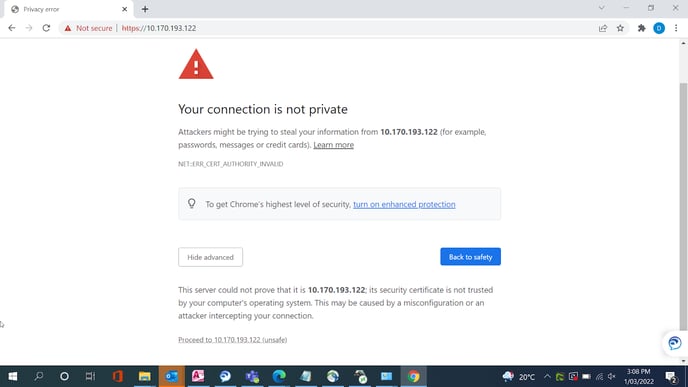
To access the Command Centre RX of the printer, enter the IP Address into any web browser.

You may get warning similar to the below image. Click Advanced > Proceed to Website/Page.
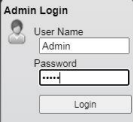
Once you’re on the Command Centre RX page you will see Admin Login in the top left. The Username and Password is: Admin
Then click ‘Login’.
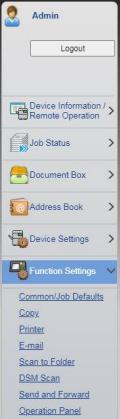
On the left side menu click on Function Menu > E-mail.
Configure your email settings
On this page you will need to enter all your email settings. You will need to enable your Kyocera printer to log into an email to be able to send scanned documents.
These email settings are set by your email provider e.g. Gmail, Office365, Telstra/Bigpond. To get access to the correct settings for your email address, we recommend doing an online search (e.g. Gmail SMTP settings) or calling your email provider if you have access to local support.
Most settings are provided in the email provider SMTP setting.
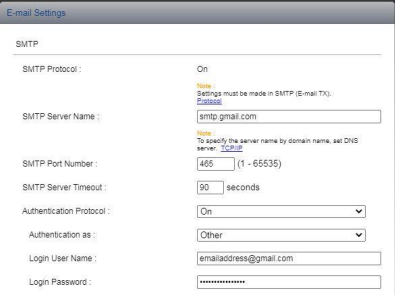
Here are the settings you need to change in the email settings page in your printer’s Command Centre:
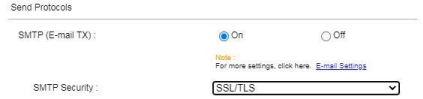
SMTP Protocol – This has to be On.
If this is off, go to Network Settings > Protocol. Under Send Protocols select On for SMTP (E-mail TX).
SMTP Server Name – This is the email providers SMTP Server Name.
SMTP Port Number – This will be either 25, 465 or 587.
SMTP Server Timeout – Change this to 90.
Authentication Protocol – Change this to On.
Authentication As – Change this to Other.
Login User Name – Your user name will be your login email address.
Login Password – Enter the password for the above email address.
SMTP Security – This option needs to be changed depending on the port number used. Changes for this will be entered on a different page. Please ensure that you enter all other details first and then click ‘Submit’ at the bottom of the page.
Now click on the blue ‘Protocol’ link to change your ‘SMTP Security’ settings.

Your SMTP Security setting will depend on the SMTP Port Number that you entered in the previous step.
SMTP Port Number 25 = No Security
SMTP Port Number 465 = SSL/TLS
SMTP Port Number 587 = STARTTLS
E-mail Size Limit – Needs to be 0. This will prevent the printer from cancelling jobs based on the size of the email.
Sender Address – This needs to be changed to the email address used in Login User name.
Once you have entered all settings click Submit.
The page will reload and display all information you have previously submitted. To ensure everything is working as expected, click the Test button.
If the test was successful, your scan to email function is now working. If you get an error code, please refer to the common scan to email error code section below to troubleshoot.
Common scan to email error codes
You can troubleshoot common error codes via the Command Centre. To identify the correct error code do a scan to email from the printer and wait for the beeps followed by the error:
1101 – SMTP Server Name does not exist. This means the SMTP Server Name is either blank or incorrect.
1102 – Login Username and/or Password is incorrect.
1104 – SMTP denied access. This means the Email server does not allow this function.
1105 – SMTP is not enabled. Change SMTP Protocol to On.
1106 – No sender address. Enter a Sender Address.
2101 – Refer to 1101.
2102 – Connection Timeout. Increase the Server Timeout.
2103 – The server cannot establish a connection. Contact IT.
2204 – File Size limit exceeded. Change the File Size to 0
3101 – SMTP Server rejected email. Refer issue to IT or check Authentication/Sender address
3102 – No SMTP Authentication found. Turn off Authentication.
4803 – Failed to establish SSL session. Wrong SMTP Security chosen. These errors can also occur if DHCP and AUTO-IP are turn off.
Common email provider settings
Gmail
SMTP Server Name: smtp.gmail.com
SMTP Port Number: 465 or 587
SMTP Security: SSL/TLS - STARTTLS
Telstra
SMTP Server Name: smtp.telstra.com
SMTP Port Number: 465 or 587
SMTP Security: SSL/TLS - STARTTLS
Office365
SMTP Server Name: smtp.office365.com
SMTP Port Number: 465 or 587
SMTP Security: SSL/TLS – STARTTLS
BigPond
SMTP Server Name: smtp.telstra.com
SMTP Port Number: 465 or 587
SMTP Security: SSL/TLS - STARTTLS
Further assistance
If you require further assistance, please feel free to contact us directly via:
- Chat: the chat in the bottom right corner of our website. ↘️
- Phone: to speak to a member of the Kyocera support team, call our helpline on:
- Australia: 135 962 and choose option 3
- New Zealand: 0800 459 623
Phone Support hours are Monday to Friday 9am to 5pm local time across Australia and New Zealand (excl public holidays).
Chat Support hours are 9am to 5pm AEST/AEDT.